Each household can not be separated from the switch socket, but for a long time, it will encounter the burnout of the socket switch, many friends do not know how to do this problem, they do not understand circuit knowledge. Actually, the switch socket wiring diagram is not as complex as you think. In fact, as long as you understand the circuit knowledge, you can install and replace it by yourself. The following small series will tell you the socket switch wiring method and socket wiring diagram .

In the first step, after the wall switch socket box is completely disassembled, clean the interior of the bottom box wall.
Switch and socket installation: firstly sanitize the installation position and clean it to remove dust and debris.
The switch socket is installed after the woodworking painter etc. It is inevitable for the long-term use of the bottom box to accumulate dust. The switch socket bottom box is cleaned of dust and impurities, and the remaining dust in the box is wiped clean with a rag. This prevents impurities from affecting the circuit operation.
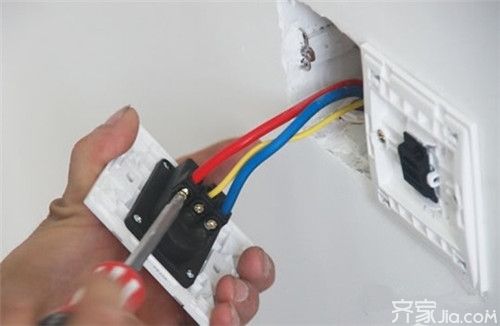
The second step, power line processing
Switch socket installation: leave the wire thrown out of the box for a certain length to be repaired in the future, and then cut out some of the wire cores, and be careful not to injure the wire core when cutting the wire core. If you can't think of it at this time, look at the few phone pictures you took. After seeing it, wind the wire in the clockwise direction on the corresponding terminal of the switch socket, then tighten the pressure head. This step requires the line. The core should not be exposed.
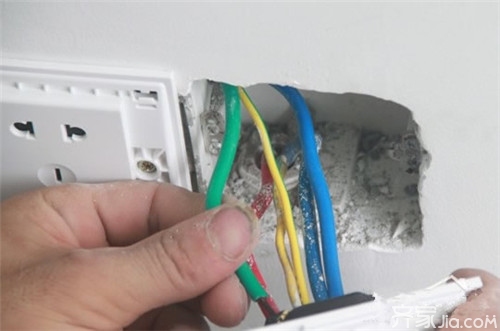
The third step, socket three wire connection method
Switch socket installation: Fire wires, neutral wires, and ground wires need to be properly connected to the socket.
The FireWire is shown in the figure, put it into one of the two holes in the switch, and leave the insulated wire in the other hole into the L hole in the three holes in the lower socket. The N hole in the three holes of the neutral line socket is fastened. Connect the E hole in the three holes of the ground access jack. If the neutral wire is miswired with the ground wire, black light and switch tripping will occur when the appliance is used.
The fourth step, switch socket fixed installation
Wall switch socket installation: Route the wires through the hole in the switch socket in their respective positions.
Put the wires left in the bottom box out of the outlet holes of the plastic table first, then stick the plastic table tightly in the wall, and fix it on the bottom box with screws. After being fixed, the conductors are pushed through the wire holes of the switch socket according to the wiring mode just after the box is opened, and the wires are pressed firmly.
The fifth step, the wall switch socket panel is fixed

Put the wall switch socket tightly on the plastic platform, position it in a right direction, then fix the screw firmly with a tool, and finally cover the decorative board.
Xiao Bian concludes: Socket wiring diagram for everyone to introduce here, is not very simple, as long as you understand the process of the socket wiring diagram to pay attention to is that the switch socket is not properly installed, easy to cause fire and electric shock and other phenomena, very Not safe,
Long can switch socket home switch socket Longsheng switch socket Clipsal switch socket switch socket top ten brand socket wiring diagram
Asme B18.2.2-2015 Hexagon Nut,Competitive Price Hexagon Nuts,Oem Hexagon Nuts,Standardspec Stainless Steel Hex Nuts
Chuangtuo Jinggong (Jiangsu) Co., LTD , https://www.chtofastener.com